Relationship Map helps you visualize the relationship landscape of the buyer's organization, with graphical maps, smart coaching and social network integration for each contact.
By identifying the right people, you can gain access and develop support to give you a competitive advantage to win.
This page provides a quick guide on how to install and configure Altify Relationship Map in your Salesforce org. If you are familiar with installing software in Salesforce, this web page should be all you need.
Required Salesforce Editions
The following Salesforce Editions are supported by Altify:
|
Pre-Requisites
|
Installing Relationship Map Express
You will install two packages:
(1) Altify Core which provides the required functionality, and
(2) the Licensing Package, needed to activate Altify Relationship Map.
Follow these steps:
1. Log in to your accounts as a Salesforce administrator.
2. Install Altify Core:
Install In Sandbox Install In Production
|
3. Install Relationship Maps Licensing Package:
Install In Sandbox Install In Production
|
Installing Output Extension App Extension Package (Optional)
The following package allows you to avail of the option to print your Relationship Maps to PowerPoint and as a PDF.
|
Setting up Altify Relationship Map
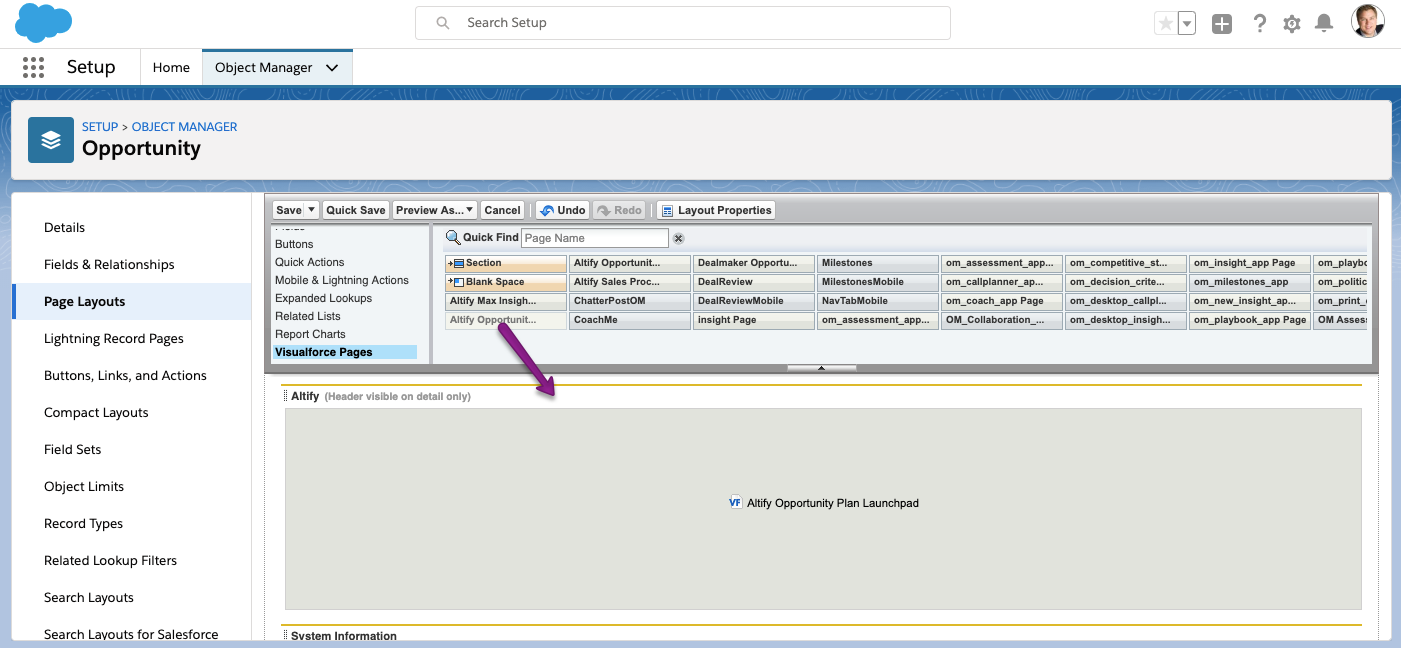
Once the packages have been installed, you can edit your Opportunity and Account Page Layout to add the Launchpad to your Opportunity and Account displays.Step 1: Add the Altify Launchpad to the Opportunity Page Layout
|
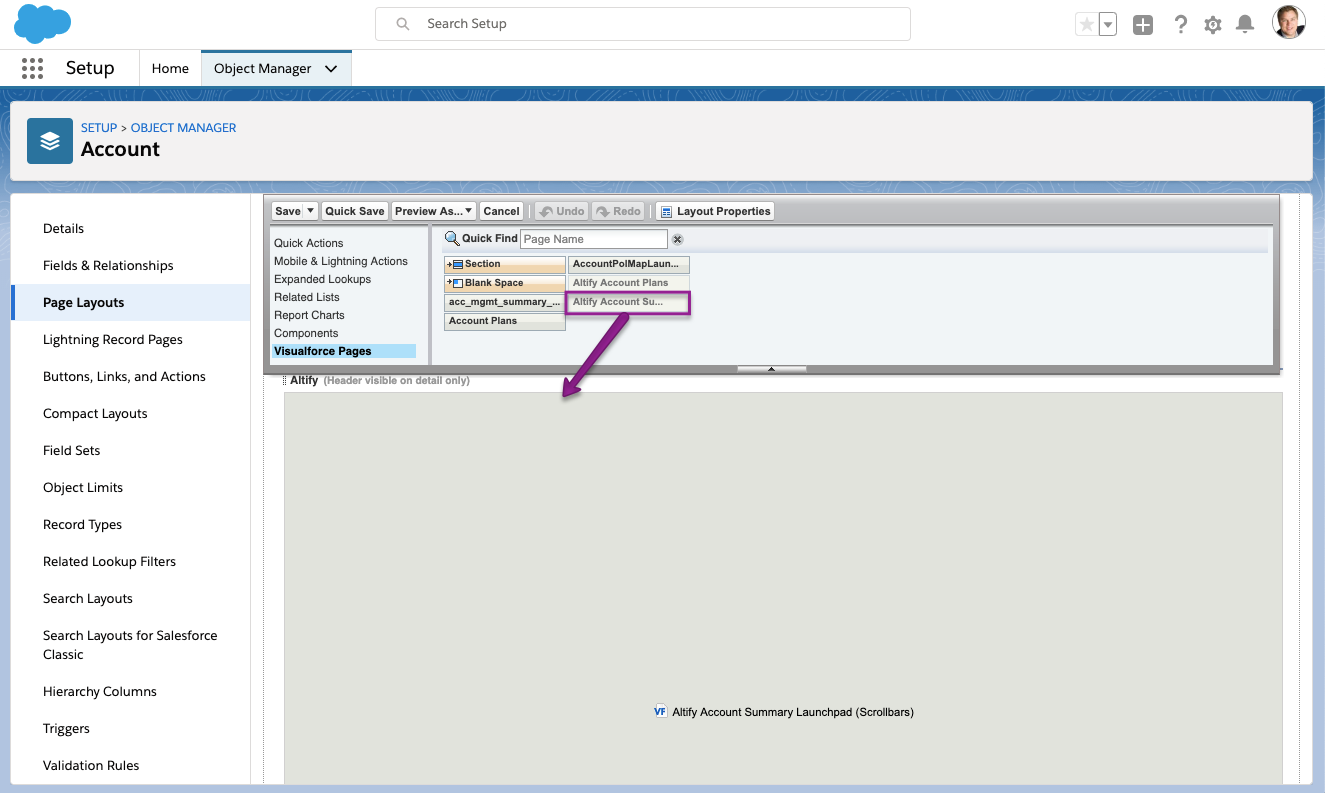
Step 2: Add the Altify Launchpad to the Account Page Layout
|
Contact Role Updates
Altify uses a number of pre-defined buying roles to describe contacts in a Relationship Map. To get the most out of the coaching advice in Altify Relationship Map, we recommend that the list of contact roles contains the following:
|
|
1. Go to Setup>Customize>Opportunities>Contact Roles On Opportunities.
2. Click New and add the four roles (shown above) to your list.
|
Licensing Your Users for Relationship Maps
Altify uses permission sets to provide standard users with access to product functions.
To make Altify available to your users, you must create a permission set and then assign the permission set and allocate licenses to users. There are two steps:
** Please note if your Salesforce org is running on Professional Edition please skip to Step 3.
Step 1: Create the Permission Set
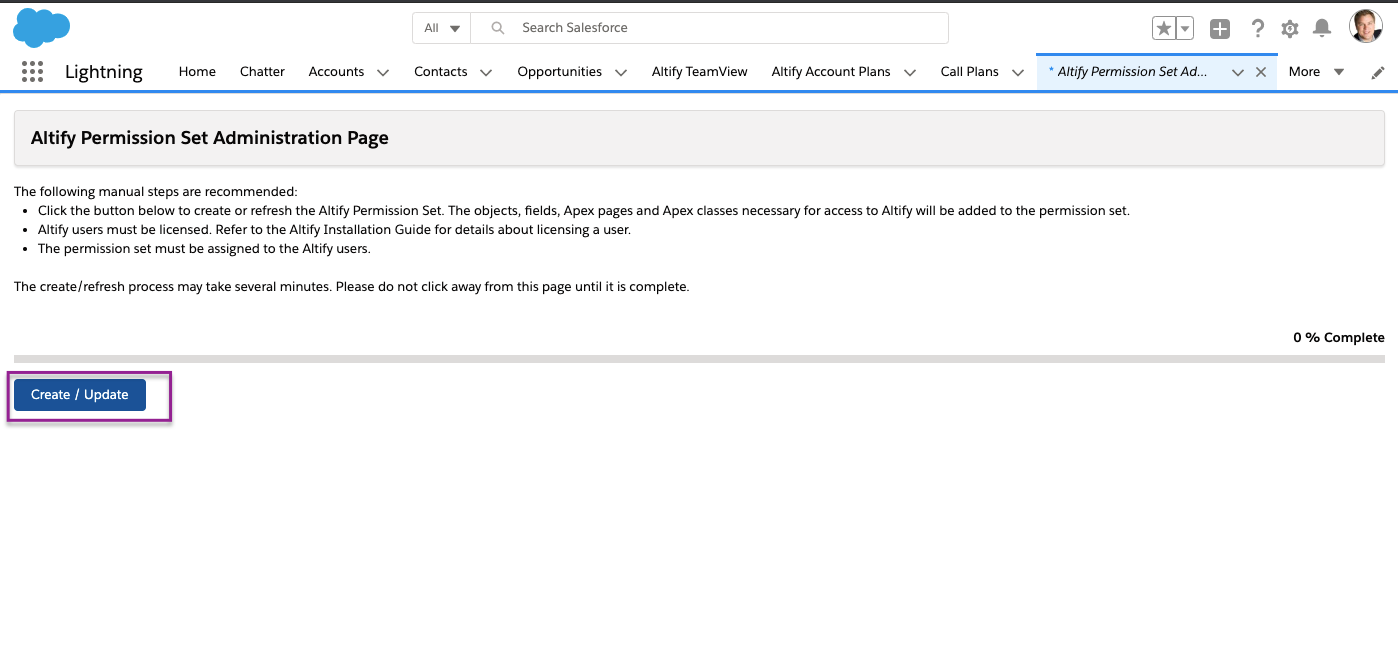
1. Go to the Altify Permission Set Administration tab in the All Tabs list, and click on the Create/Update button to create a permission set for Altify. The objects, fields, Apex pages and Apex classes that are necessary to access Altify are added to the permission set.
2. You can now proceed to enable the required tabs for this permission set.
Step 2: Assign the Permission Set
1. Go to Setup > Administration Setup > Manage Users > Users.
2. Click on the user you want to edit.
3. In the Permission Set Assignments section, click Edit Assignments.

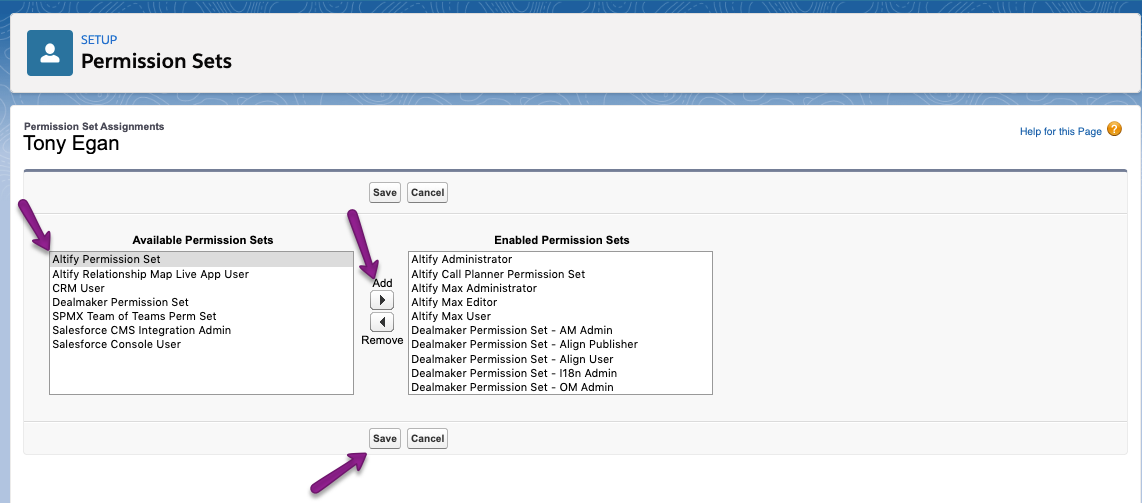
4. Add the Altify Permission Set for the user.
Step 3: Allocate licenses to users
1. Go to the Managed Packages section and click Assign Licenses.
2. Select the options for Altify and Relationship Map Express.
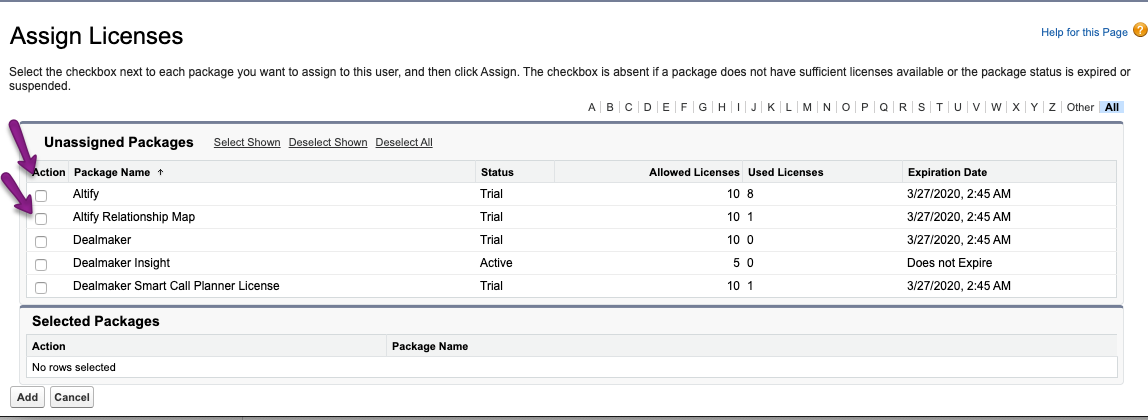
3. When you have selected both options, click Add.
